Table of contents
Looking to take your eCommerce store to the next level? Cartzy Wheelify can help! This app takes the mundane task of shopping and turns it into a fun, gamified experience. Read below to learn how it works so you can start using it today! You can also watch a quick demo video shared at the end of this help article.
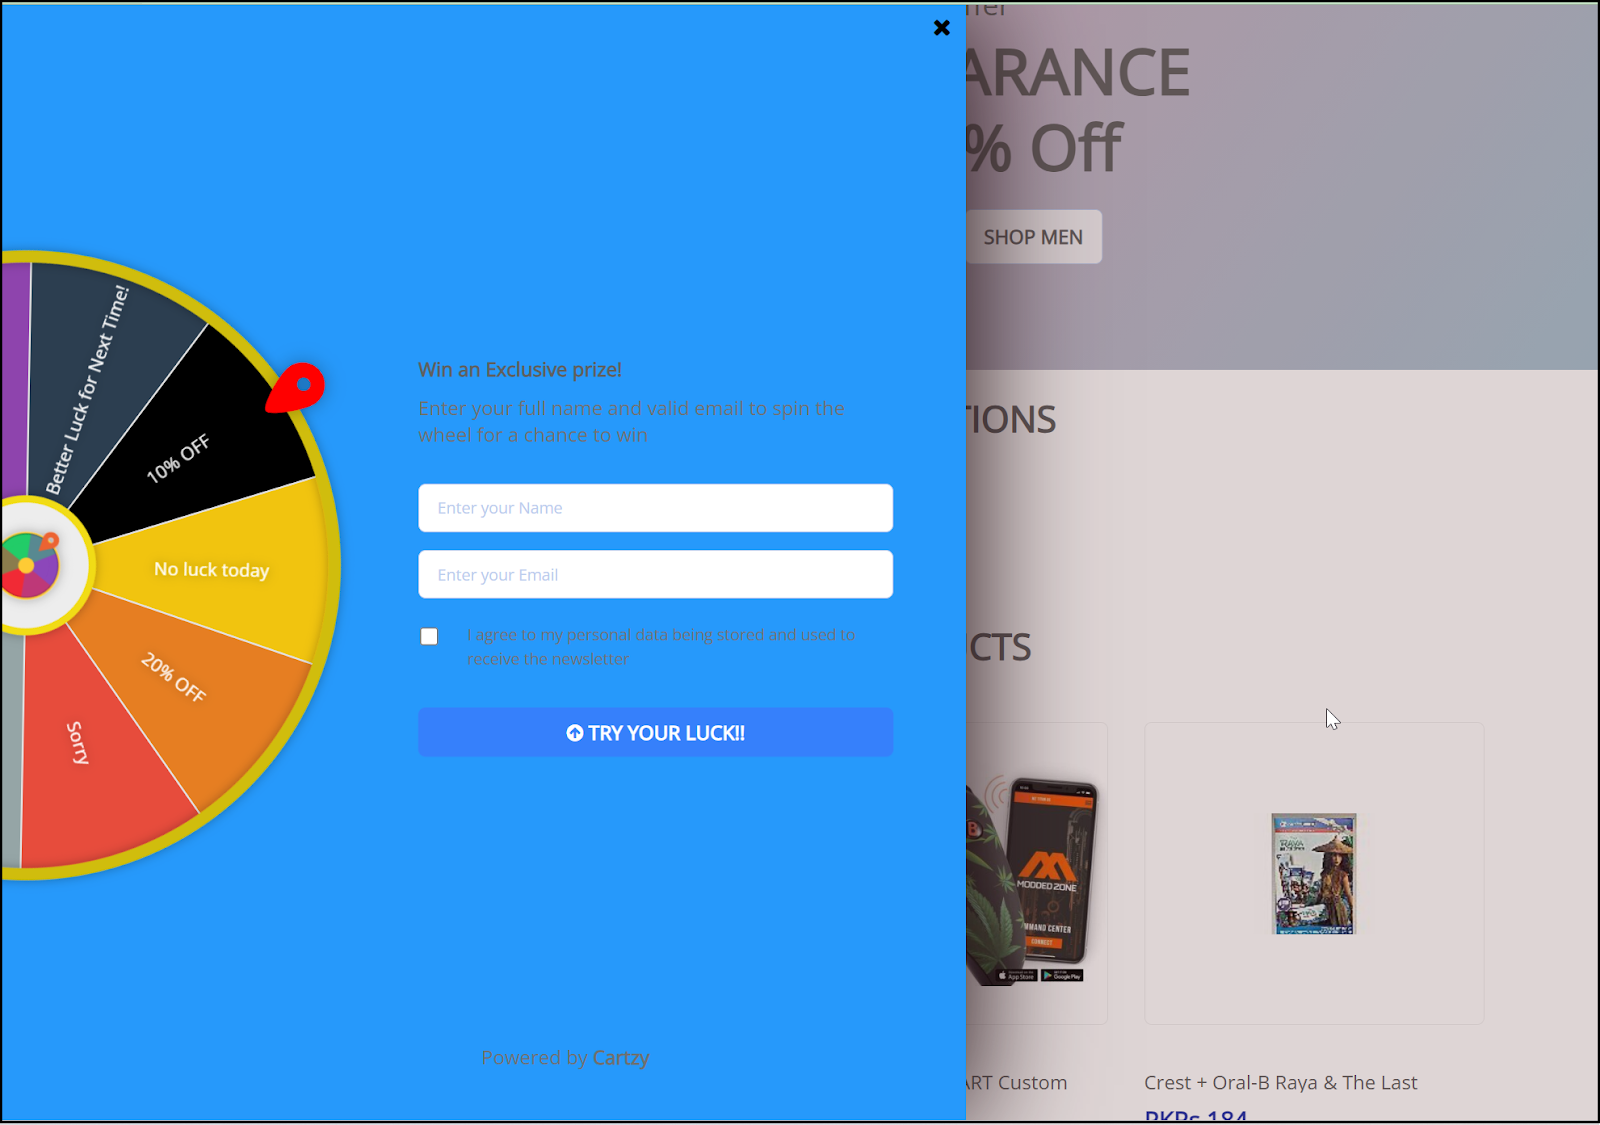
👉 The Wheelify app in Cartzy enables you to add a “spin the wheel” popup on your website for your customers to win exclusive prizes. This is also another way of getting leads for your marketing campaigns.
Enabling Wheelify on your store
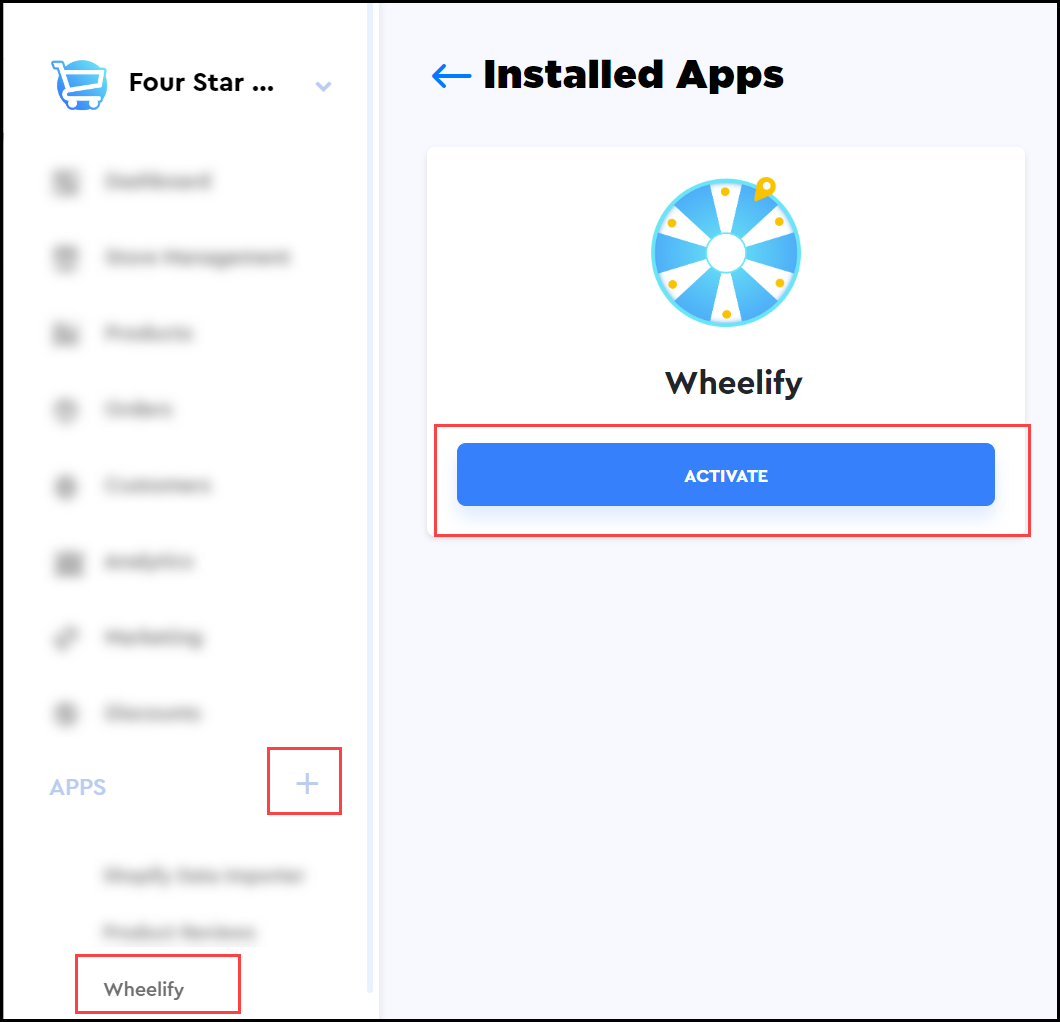
1. In your Cartzy admin panel, go to Apps > click + icon > select Wheelify > click Activate.
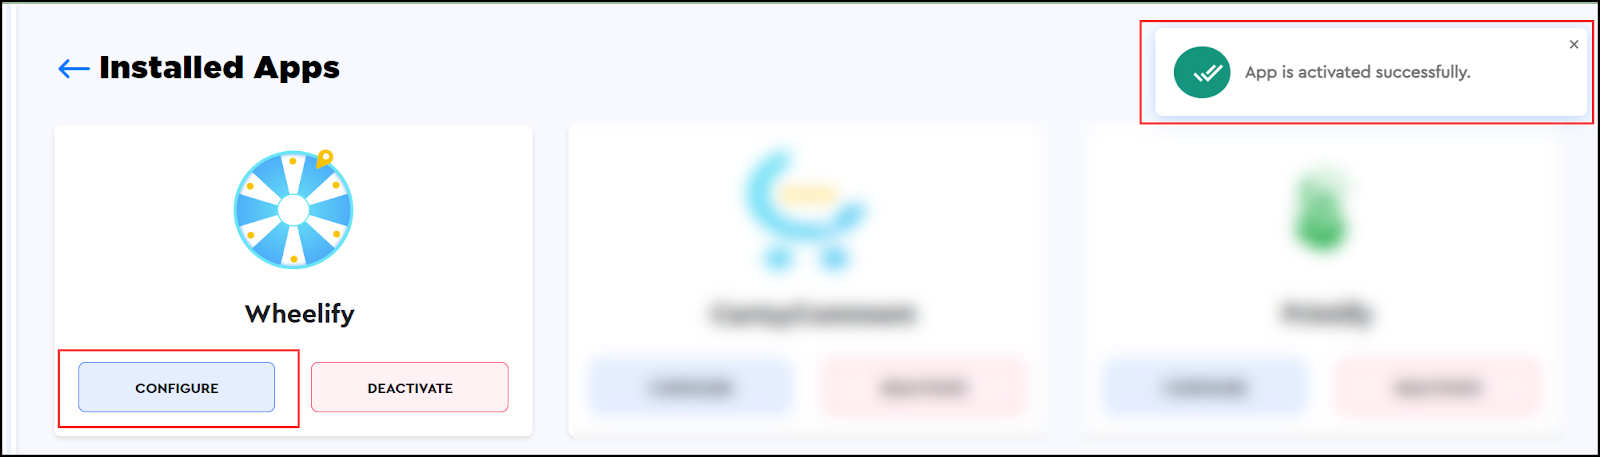
2. The Wheelify app will be activated, and the buttons “Configure” and “Deactivate” will be enabled. Click on the Configure button.
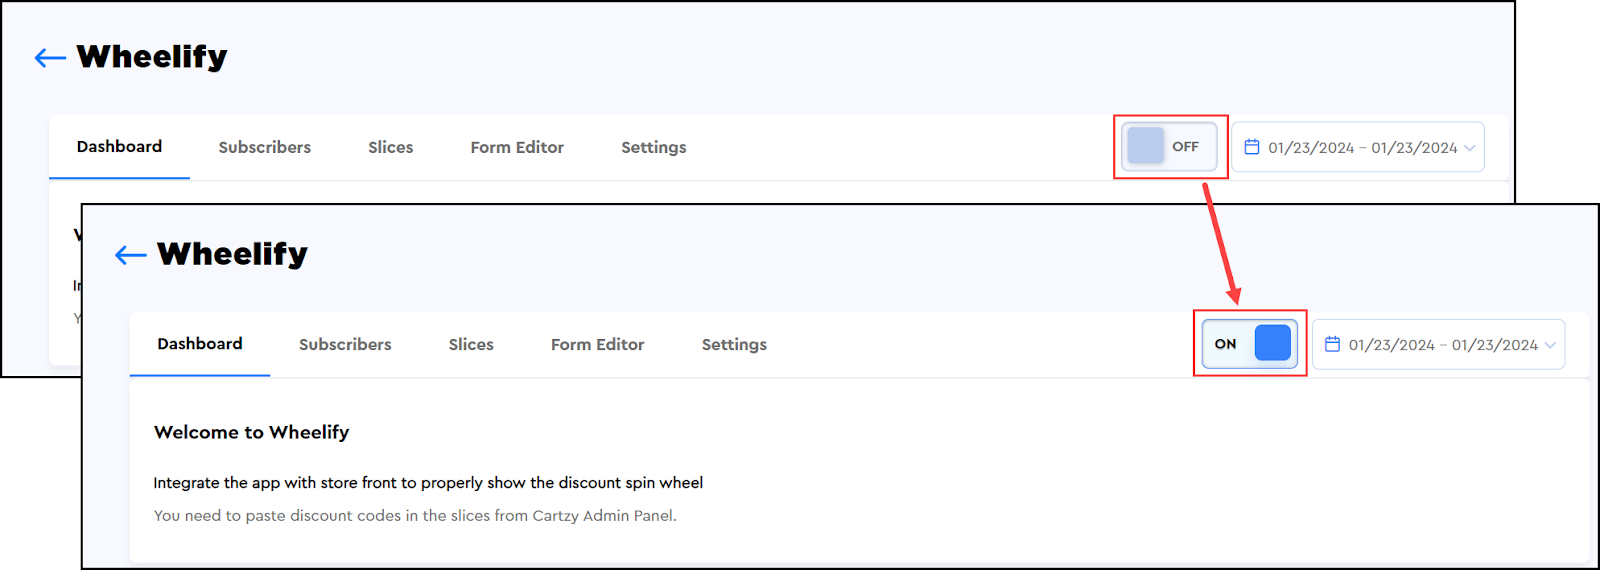
3. On the Wheelify Dashboard, slide the “ON/OFF toggle” to the right. The app will be activated. The next thing you need to do is to configure the wheel for win/lose cases.
4. If you visit your store, you will be able to see that the Wheelify popup has been enabled with its default settings. To configure its layout, switch to the Slices tab.
Configuring Wheelify
Slices
On this tab, you can configure the win & lose cases/sections of your wheel. There are a total of 10 options available by default i.e., 5 for win and 5 for lose. Each section represents a slice on your wheel. You can explicitly configure each win and lose case.

Win
For win cases, you can explicitly edit the following options:
- Label: That’s the label of the slice. For example, 10% OFF
- Win text: The text that is used to display the result of spinning the wheel.
- Discount: Using this dropdown, you can select the discount voucher that you want to offer if the wheel pointer stops on a certain slice. You must already have discounts created in the system for them to appear in this dropdown list. If there are no discounts, you can create new discount codes.
- Percentage: Enter the percentage from 0 - 100 to define the chances of stopping the wheel for a certain slice. For example, if you are offering a 10% OFF discount on one slice and a “Free shipping” prize on another slice, but you want to give away only the 10% OFF discount, then you can do so by increasing the appearance percentage of the 10% OFF discount. You can set it to 65%. And, if you never actually want to give away the “Free Shipping” then you can just display it with the percentage set to 0%.
- Slice Color: Each slice on the wheel can be colored differently. Just enter the code or use the color picker by clicking on the color box.
Lose
For each lost case, you need only the following features to edit:
- Label: This is the text of the slice for the lost case. For each lost case, you can set a different label.
- Slice Color: You can set different colors for different cases. Just enter the code or use the color picker by clicking on the color box.
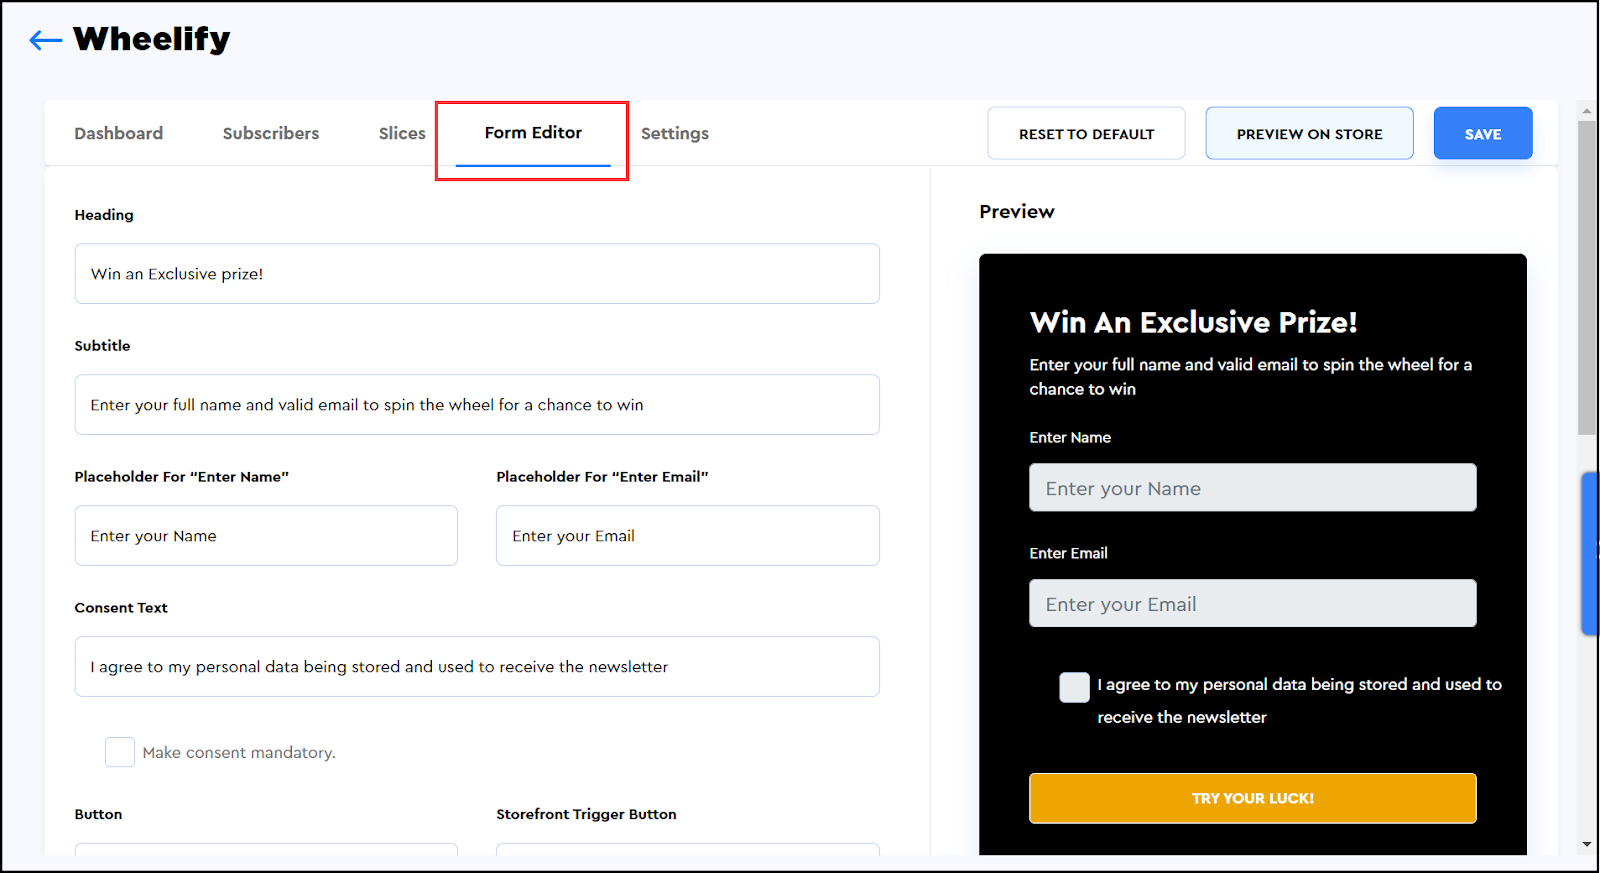
Form Editor
On this tab, you can configure the layout of the spinning wheel popup. Since this also acts as a form for collecting the customers’ information for marketing purposes, therefore the name “Form Editor”. You can configure the following features of the Wheelify form:
- Heading: This is the title of the form.
- Subtitle: This is the form description.
- Placeholder for “Enter Name”: Placeholder text for the input field used to get the name of the customer.
- Placeholder for “Enter Email”: The default text for the input field used to get the email ID of the customer.
- Consent text: This is the text to be displayed next to the checkbox for getting the consent of the customers for storing and using their data for promotions.
- Make consent mandatory checkbox: If this is checked, the provision of consent for storing and using their data will be mandatory for the end users before they spin the wheel.
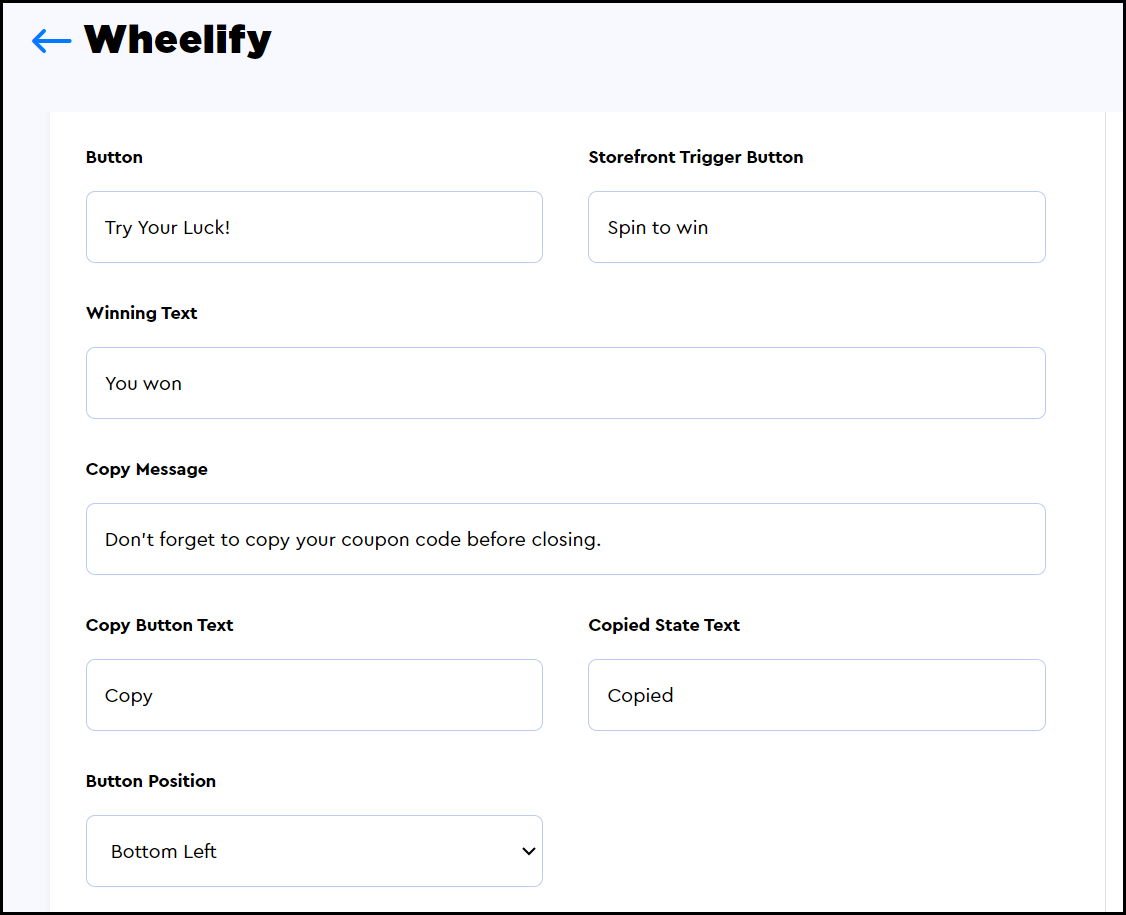
- Button: The label of the button that is used to spin the wheel. This button is available on the Wheelify popup form.
- Storefront Trigger Button: This is an additional button that can be enabled on the storefront for the user to click open the Wheelify popup form.
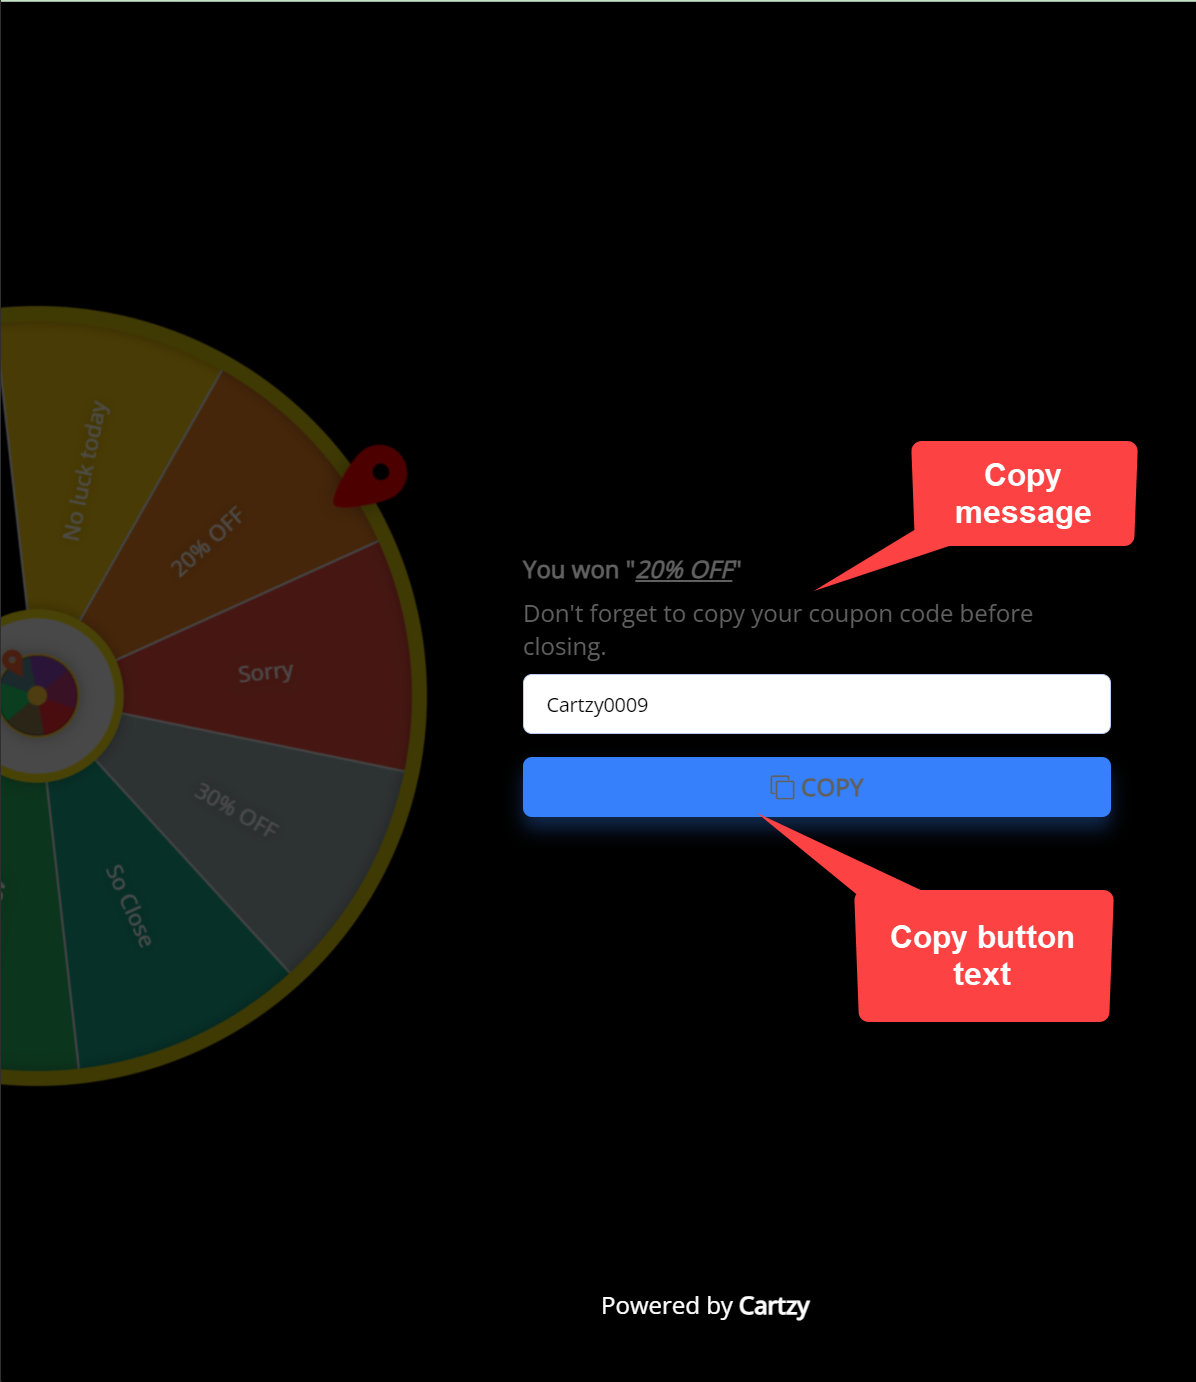
- Winning Text: The text for the win case is customizable. You can enter the message here that you want to display to the user upon winning a prize.
- Copy Message: The message that you want to display to the user upon winning a prize. This is to tell the user that they must copy the discount code before closing the popup.
- Copy Button Text: This is the copy button label.
- Copied State Text: The label that appears on the button upon clicking the Copy button.
- Button Position: Position of the button on the popup.
Storefront trigger button
- Spinner Background Color: The background color of the Wheelify popup.
- Button Color: The color of the main button on the Wheelify form.
- Button Text Color: The color of the button text.
- Header Text Color: The color of the title of the form.
- Form Text Color: The color of the subtitle/description, field names, and other messages that appear on the form.

Copy message and Copy button
Settings
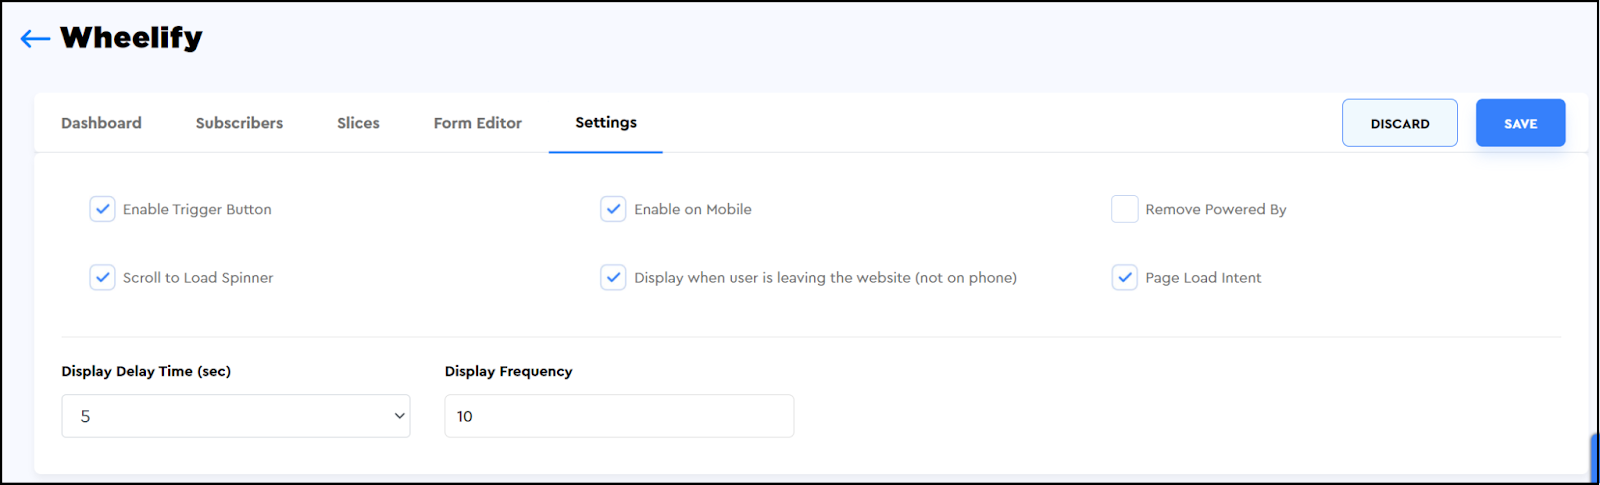
On the Settings tab, you can enable/disable the following options:
- Enable Trigger Button: Checking this option will enable a button on your website. The users can click it to open the Wheelify popup.
- Enable on Mobile: Keep this unchecked if you don’t want to display the Wheelify popup on mobile devices. It is recommended to keep it unchecked/disabled.
- Remove Powered by: Enabling this option will display the text “Powered by Cartzy” at the bottom of the Wheelify popup.
- Scroll to Load Spinner: If checked, display the Wheelify popup when the user scrolls the website.
You can also configure the following for the Wheelify popup.
Display Delay Time: When the Storefront trigger button is not enabled, you can set this time delay for the automatic display of the Wheelify popup on your website. For example, if you set it to 1 second, then the Wheelify popup will automatically open on the store right after 1 second when the store website is loaded completely in the browser.
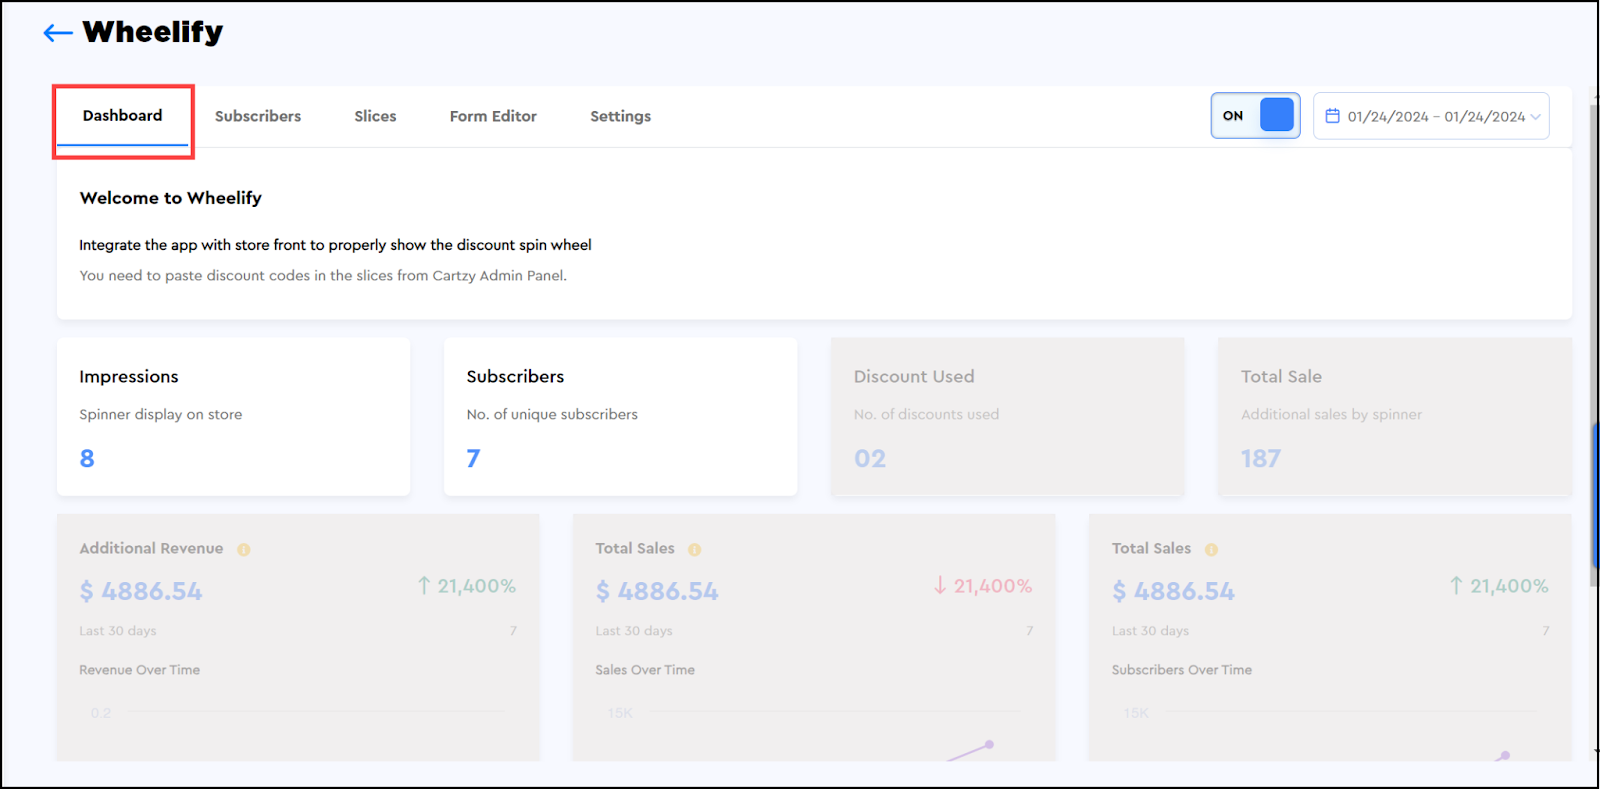
Wheelify Dashboard
The Wheelify Dashboard displays a snapshot of Wheelify analytics:
- Impressions: The number of times the Wheelify popup was displayed/opened on your store.
- Subscribers: The number of subscribers who tried their luck by spinning the wheel on your store.
- The grayed-out sections display the overall stats of your store performance.
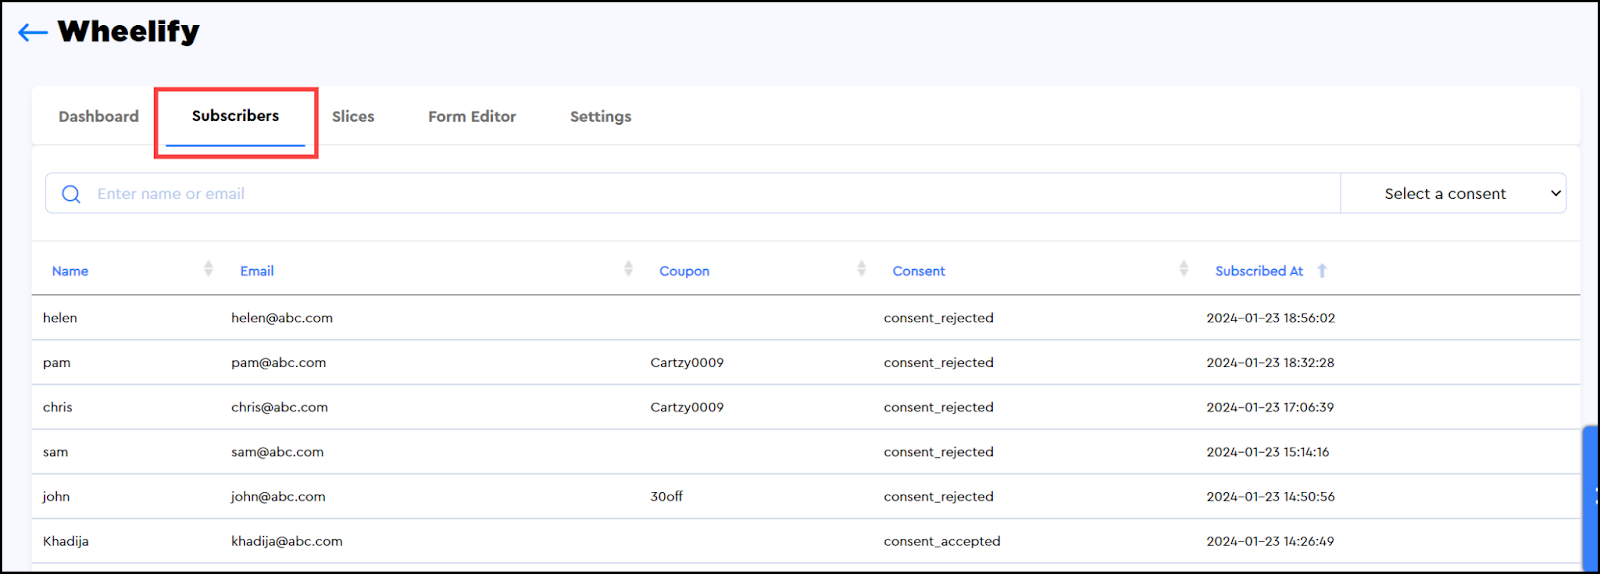
Subscribers
The users’ information that is captured through the Wheelify form is displayed on this tab. Their name, email ID, coupons won, and consent given/denial status are shown along with the date and time at which they played the “spin the wheel” on your store.