Table of Contents
Cartzy allows you to efficiently create and customize the following pages for your store:
1. About Us: On this page, you can add a description of your online store/business. This helps the users learn about your vision, mission, and values.
2. Contact Us: This page allows you to enable visitors to contact you through message, email, or phone number.
3. FAQs: Using this page, you can provide answers to frequently asked questions for your users. It helps your customer support team be more efficient in dealing with complex issues.
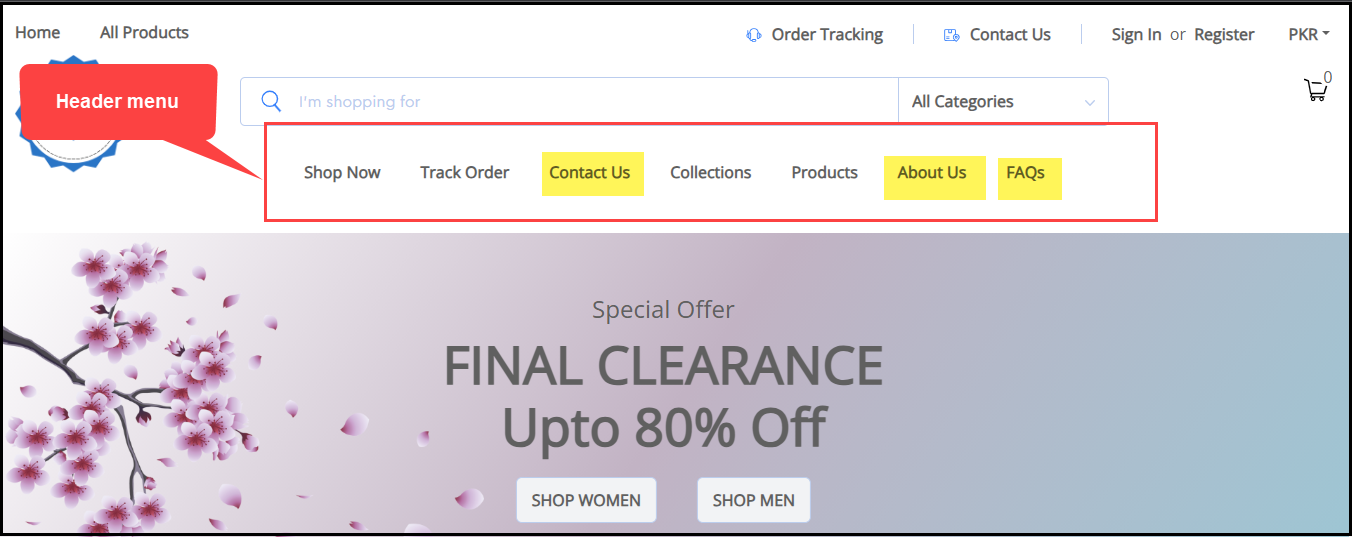
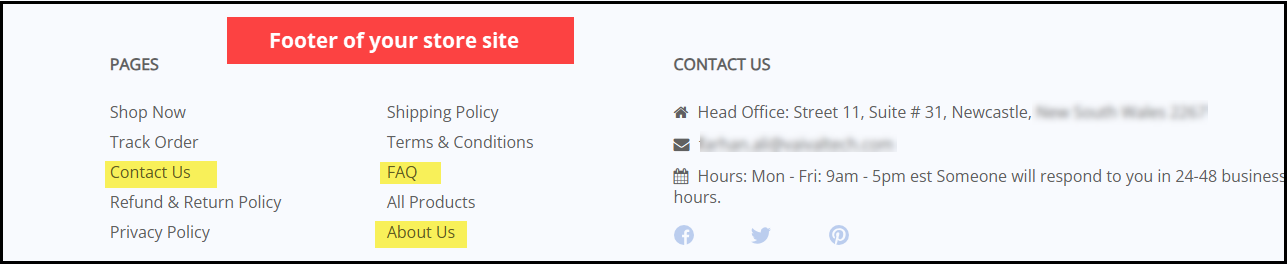
The above-listed three pages, when created, are linked to the footer of your store site. You can also add these pages to the header menu of your store.
Path: Store Management > Pages
There are two ways to create and publish the above-listed pages:
1. Customize the page as you want
2. Create from a template
Customizing Pages
Cartzy provides a text editor for each page to effectively and efficiently edit the page content. The editor is enriched with advanced formatting options as illustrated in the image below.

Variable placeholders
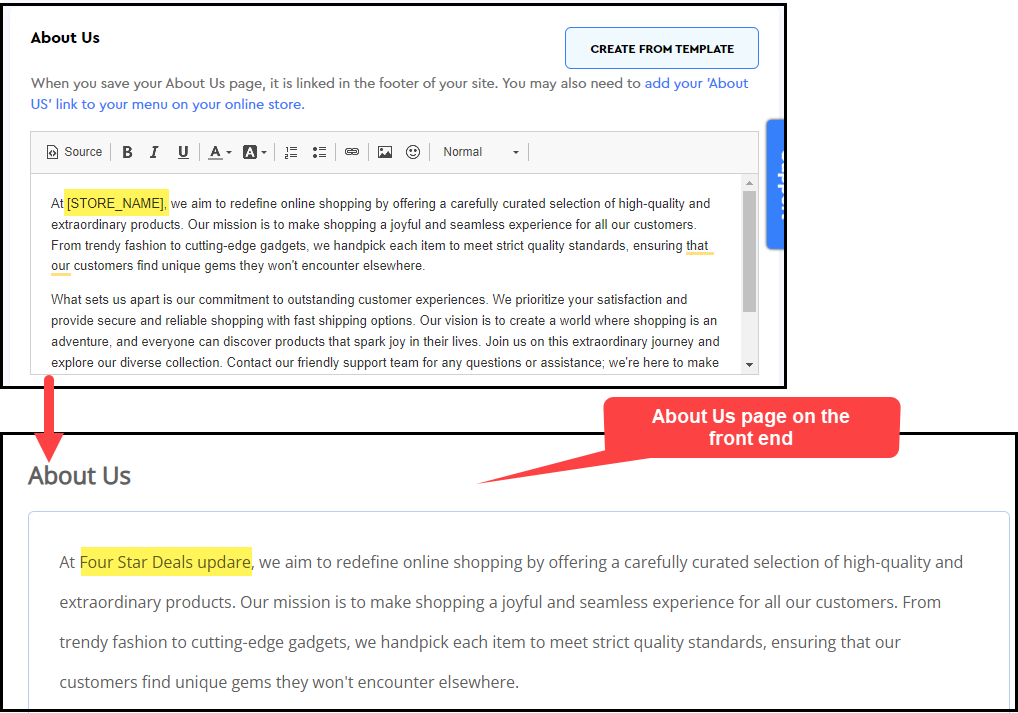
You may also notice variable placeholders such as [STORE_NAME] already given in the text editors. For example, the About Us content editor box contains [STORE_NAME]. It’s the variable placeholder for your store name i.e., it automatically picks up your current store name. So rather than using your store name in text form such as “Cartzy”, you can use this variable [STORE_NAME] in your content. So, if you ever change the store name, the content will also be updated automatically to reflect your new store name.
So, variable placeholders can be used for the content that is global to the website such as store name, or location, so that the text automatically updates whenever you change the variable value.
Whenever you make changes to your content, you need to click “Save” to save and publish the page (more details are given below).
Creating from a template
You can use this button in two ways:
1. Publish the default page: If you don’t want to customize any of the pages, and want to publish the default pages, you can simply click it. It will publish the page with default settings/design/format.
2. Undo customizations: If you click the button “Create from Template” for any of the pages after customization, all your page settings will be lost, and that page will be set to default design and content. So, in this case, this button can be used to “undo” the customizations of a page altogether.
About Us page
The default template contains only the store name placeholder.

Contact Us page
The default template contains a Contact Us form. You can only edit the instruction text given at the top of the form.

FAQs page
The default template of the FAQs page contains nothing. So, you need to either fill it up with the FAQ content related to your store, or you can simply hide the page as well if you don’t have any content.
You can hide the FAQs page at the path: Store Management > Navigation.

Saving and publishing a page
Whenever you start writing or making changes to the content in the editor box for any of the three pages, the Unsaved Changes notification popup appears at the bottom with the two buttons:
-
Discard: Clicking on the Discard button will revert back all the changes you have made to your page, and you will lose all your customizations.
-
Save: To save your edits, you need to click on the Save button.
To restore the default template, click Save. If you want to keep your customizations, click Discard.

Adding a page to a menu
Against each page, there is a link given to add the page to the menus available on your store. Clicking on the link will take you to the Navigations page where you can configure the Header and Footer menus of your store.

In the image shared below, all three pages, are linked to the header menu of the store.