Table of contents
Offering seasonal or holiday discounts has always been a smart marketing strategy to drive sales on your online store. In Cartzy, you can efficiently set up the four types of discounts as per your needs.
1. Fixed amount
2. Percentage discount (%)
3. Free shipping
4. Buy X get Y free
You can also create gift cards for your customers that they can use in their future purchases. But, discounts are effective when you want an immediate and massive influx of sales during a short period, such as the Christmas holidays.
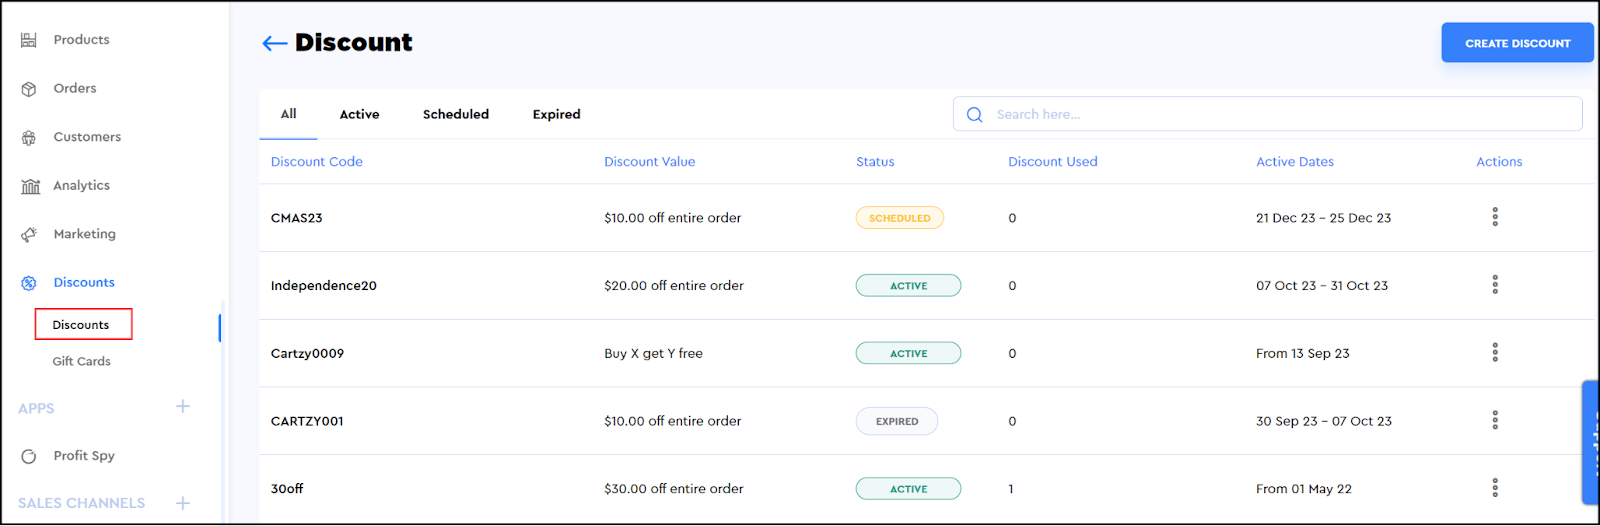
Navigation path: Discounts > Discounts
On the Discounts page in Cartzy, all the discounts are listed by the following information:
- Discount code
- Discount value
- Active/inactive status
- Discount used: The number of times the discount has been used by the customers.
- Active dates: The dates reflect the start and end dates of the discount.
Filtered lists
Cartzy enables you to filter the discounts by status. For example, if you want to view only the active discounts, then you can do so by switching to the Active tab. Hence, by switching to the following three tabs, you can view discount lists filtered by status.
- Active
- Scheduled
- Expired
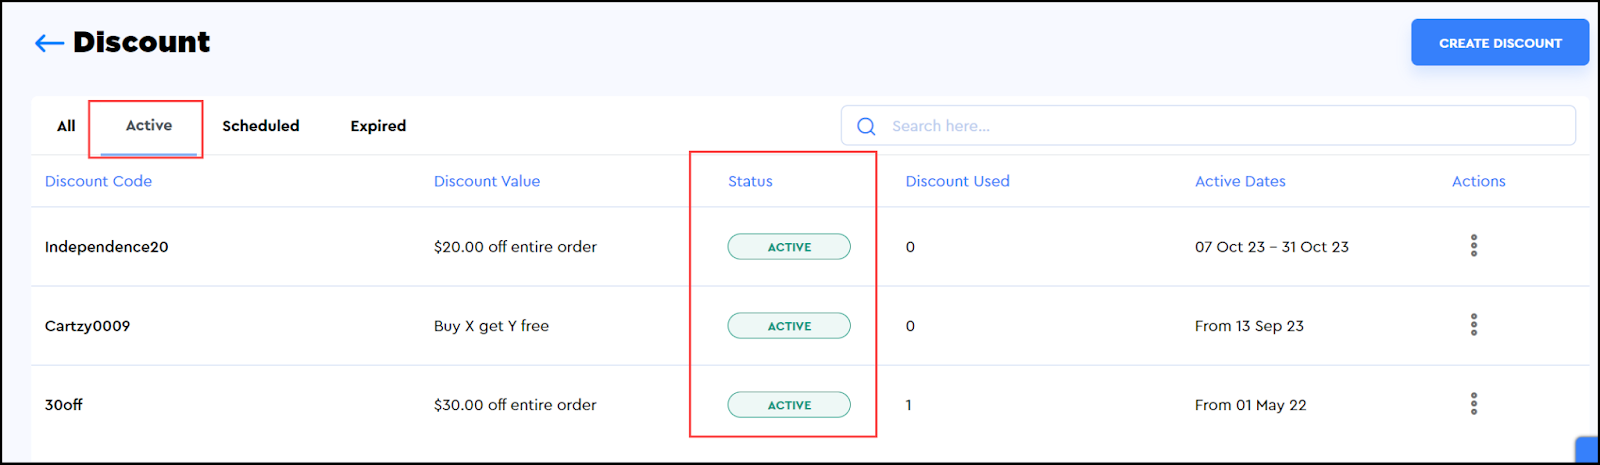
Active
This tab shows the list of only the active discounts available in your store as demonstrated in the image shared below.
An active discount is the one that is currently available for use. In other words, the expiry or the end date of the discount is yet to come, and till then the discount will remain active.
Scheduled
This tab shows the list of only the scheduled discounts available in your store as demonstrated in the image shared below.
A scheduled discount does not get activated instantly but is activated when its start date is reached. In short, you can schedule a discount in advance for later. For example, you can schedule discounts for the Christmas holidays in November.

Expired discounts
This tab shows the list of only the expired discounts available in your store as demonstrated in the image shared below.
An expired discount is the one for which the end date is passed.

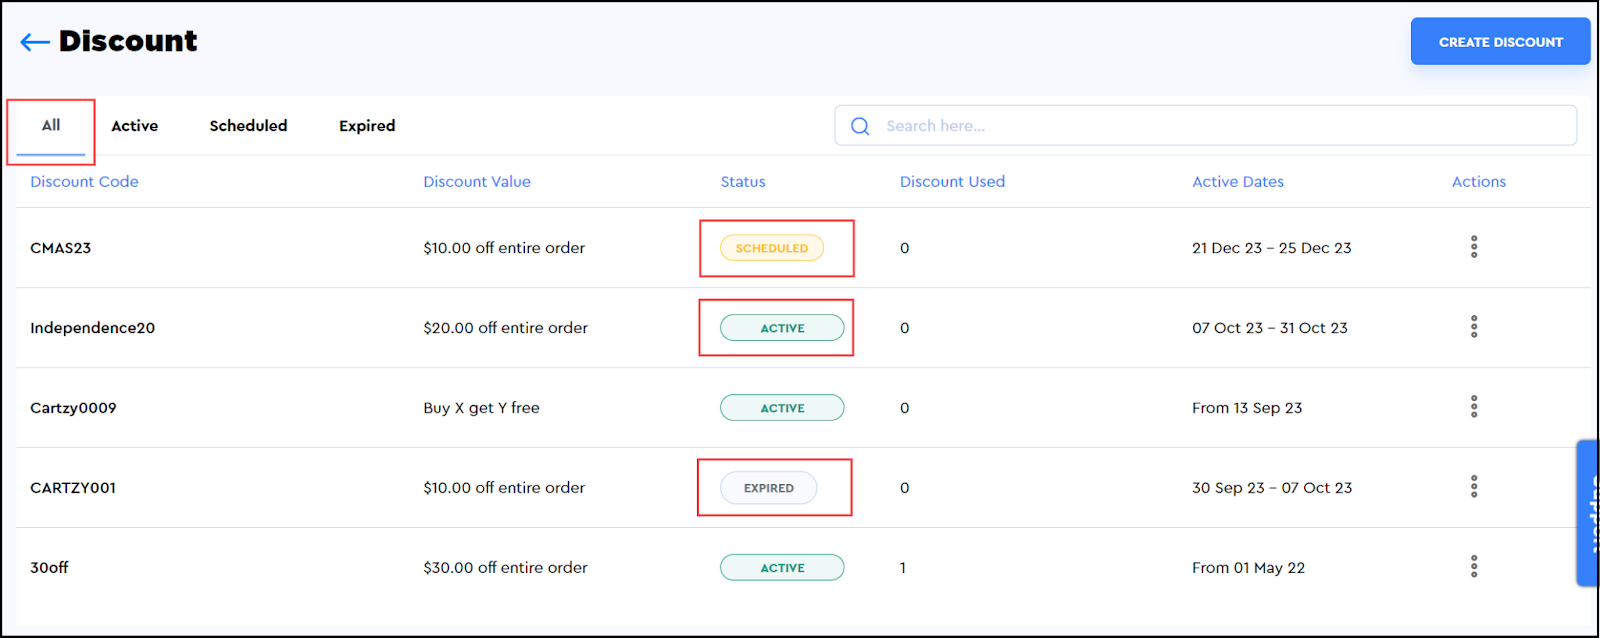
All discounts
This tab shows the list of all the discounts available in your store as demonstrated in the image shared below.
Actions
Once a discount is created and saved successfully in the system, you can always delete it, edit it, or disable it. To do so, you need to click on the kebab menu icon against the discount and select the appropriate action to perform the desired action.

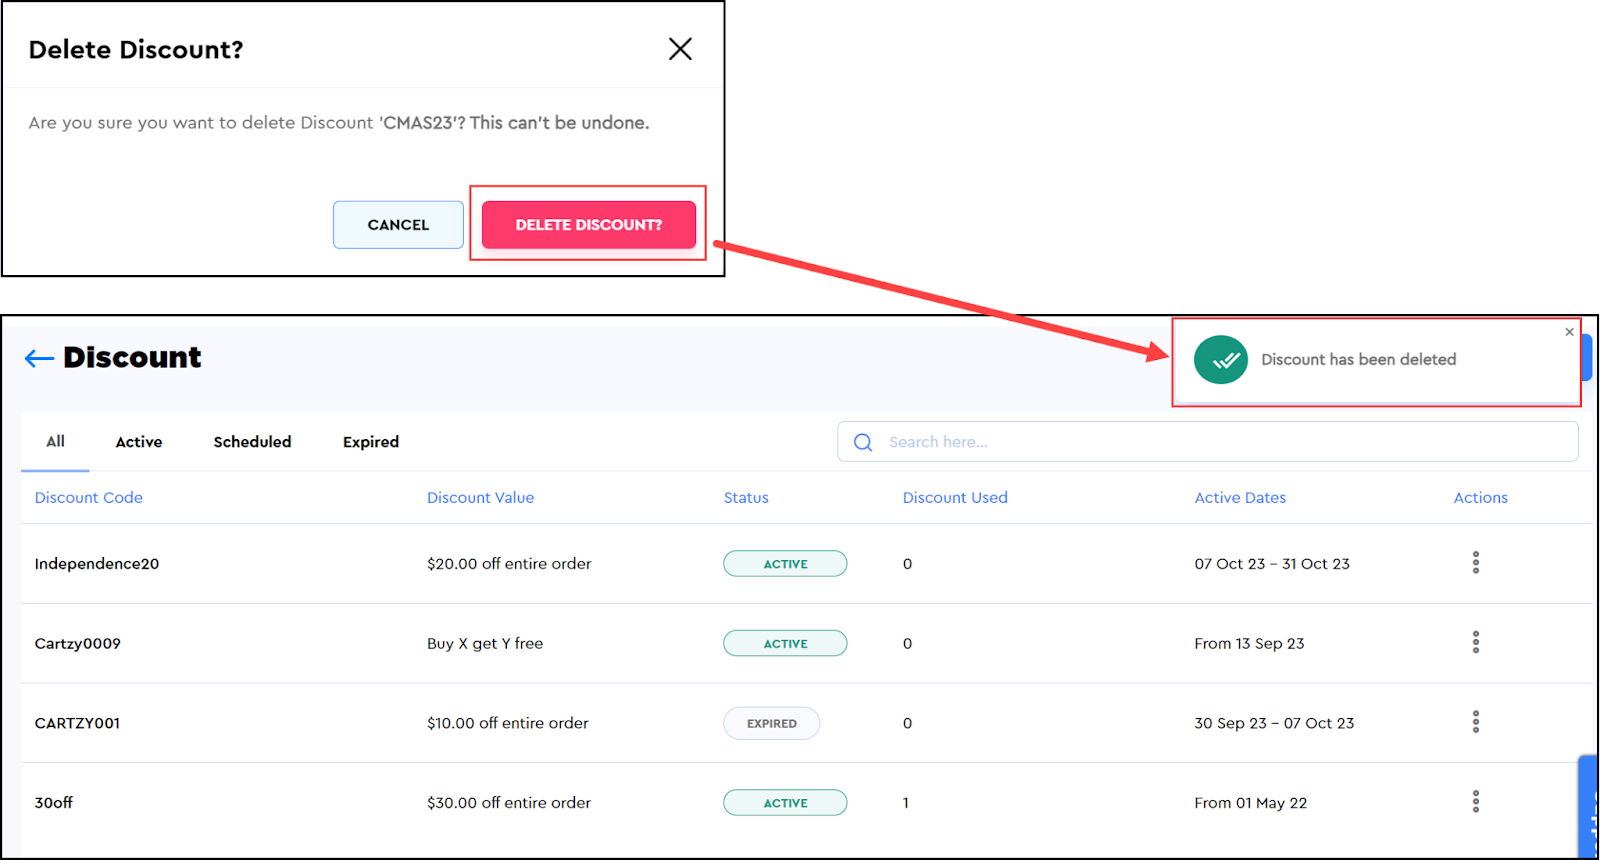
Delete a discount
When you attempt to delete a discount, you are prompted with a confirmation popup. Click on the Delete Discount button to delete the discount permanently from the system. When a discount is deleted, a success notification appears in a popup on the top right corner of the page. The Discounts page also refreshes to display the updated list of remaining discounts.
Enable/disable a discount
An active discount can be disabled at any time regardless of its expiry date. You can disable a discount for any given reason. For example, you mistakenly activated a discount that was meant for test purposes. So, you can disable it, rather than deleting it permanently from the system.
| ❗️ A disabled discount is not available to the end users. |
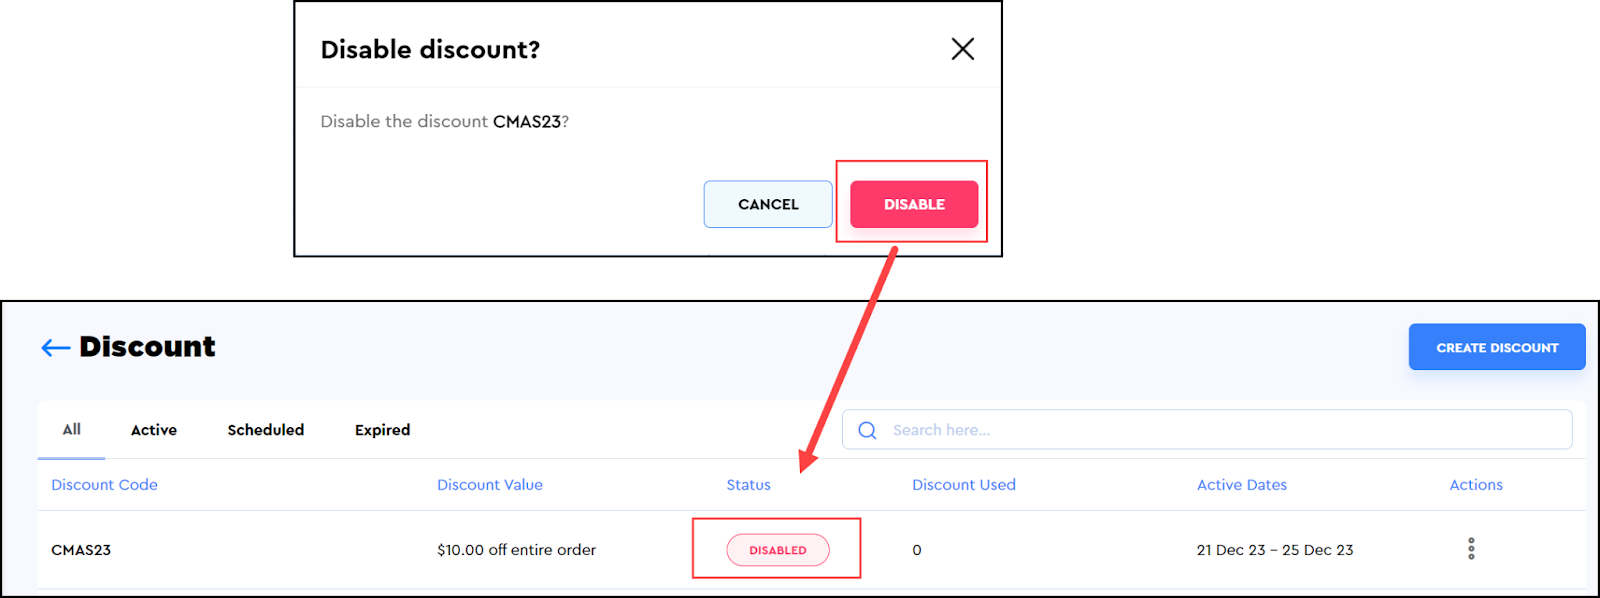
Disabling a discount
1. Select the Disable option from the dropdown that appears upon clicking the kebab menu icon against the discount code on the Discounts page.
2. You will be prompted to confirm the action. Click on the Disable button on the Disable discount popup.
Enabling a discount
When a discount is disabled, the third option in the Actions dropdown is updated to “Enable". So, you can simply follow these two steps to enable a disabled account.
1. Select the Enable option by clicking on the kebab menu icon against the disabled discount on the Discounts page.
2. You will be prompted to confirm the action. Click on the Enable button on the Enable discount popup to enable the discount.
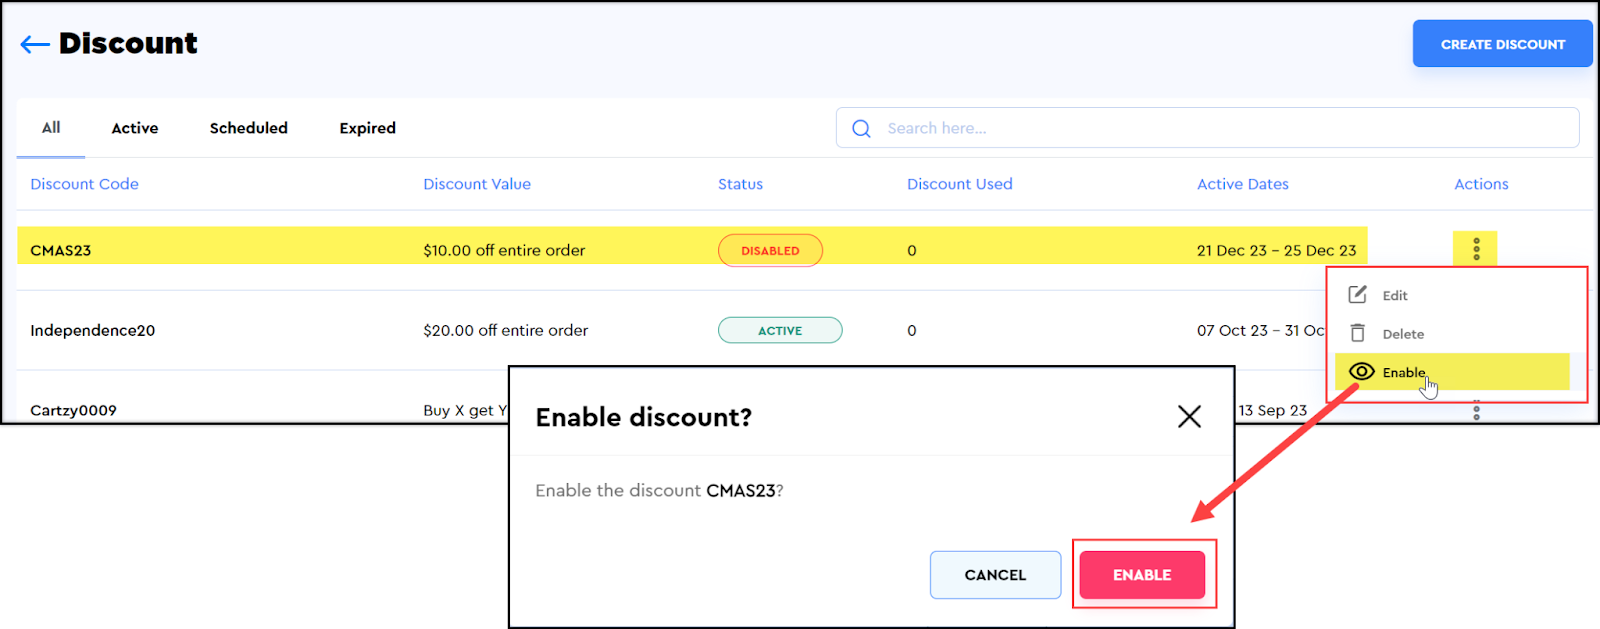
| 👉 The account will be enabled immediately. The status of the discount will be RESTORED to its previous state as illustrated in the image shared below. |

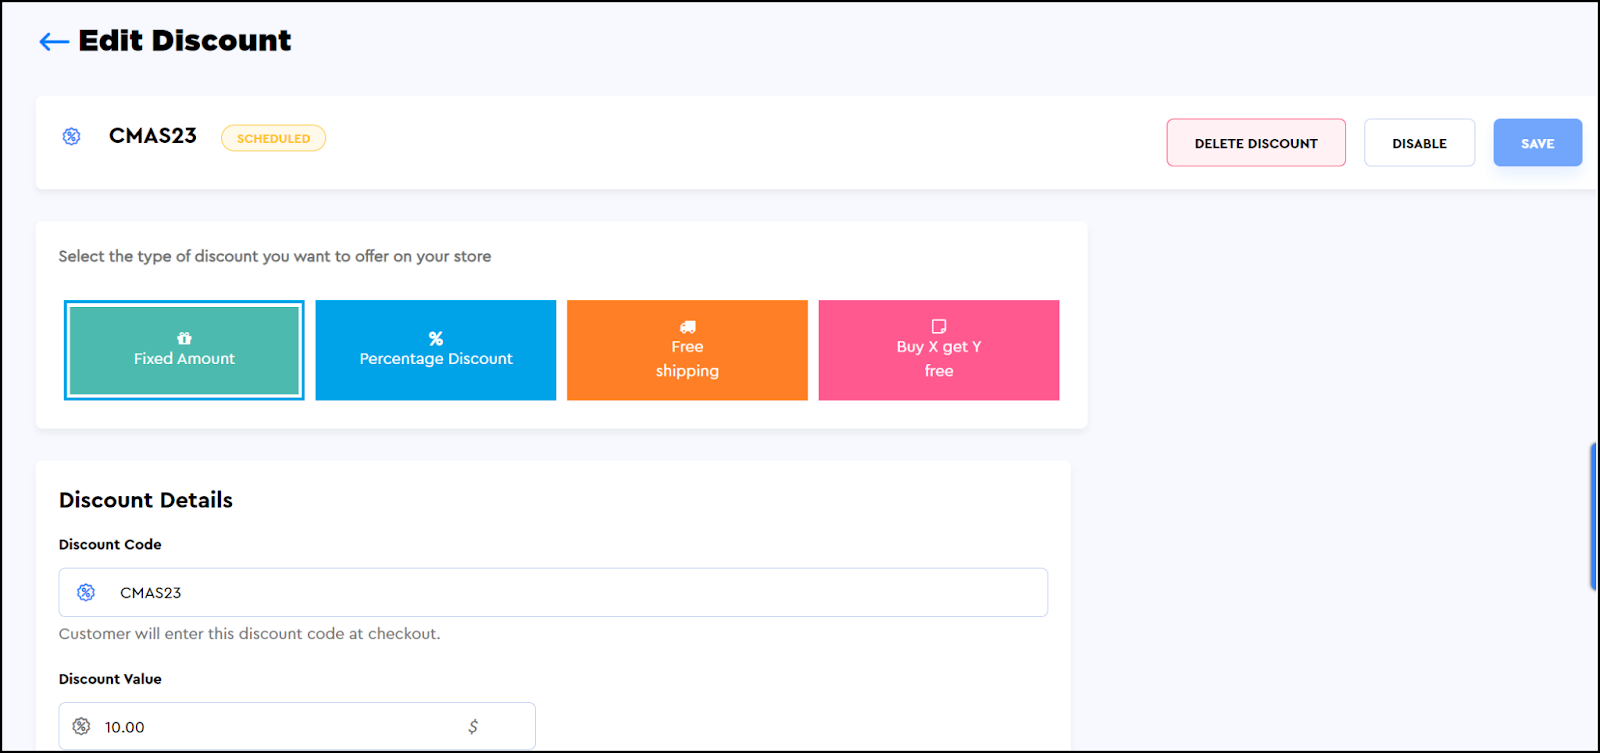
Edit a discount
To edit a discount, simply select the Edit option under the Actions dropdown by clicking the kebab menu icon given against the discount code on the Discounts page.
The discount details will be opened in editable mode on the Edit Discount page. Here, you can make your desired changes.