Table of contents
Cartzy provides robust role-based access control (RBAC) functionality, allowing store business owners to tailor user permissions and responsibilities based on distinct roles within the system. The purpose of this feature is to enable efficient management of the e-commerce store and enhance operational control.
We can break down it for you in two major steps:
1. Creating a role with specific permissions
2. Adding a user with a role assignment
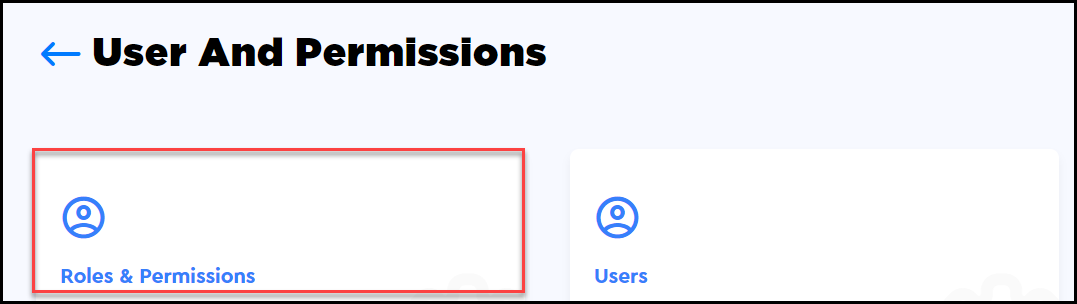
Path: Settings > Users & Permissions.
Roles
Roles are user profiles with a specific set of permissions. For example, Admin, Sales Representative, Accountant, Marketing Executive, and so on. A role can be assigned to multiple users. For example, if you have a support team of 5 support agents, then you need to create a role of “Support Administrator” only once and assign that role to all 5 users (agents).
Click on Roles & Permissions to create and manage roles and their permissions.
Create a role
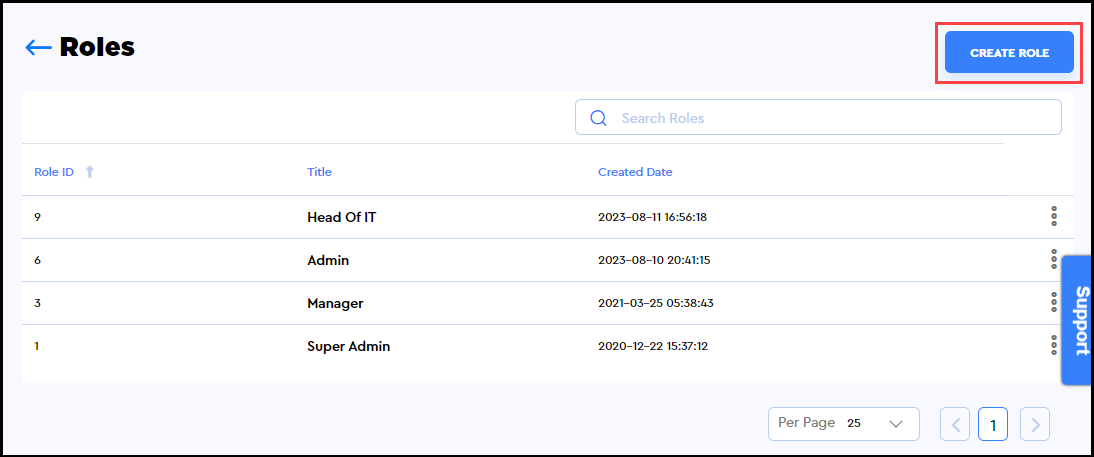
1. To create a role, click on the Create Role button at the top right corner of the page.
2. Upon clicking the Create Role button, a Create Role popup will appear with the Title input field. Here you can enter the name of the role that best matches your new role requirements. Click Submit, when done.
For example, in the image below, we have added “Sales Rep” to create a role for sales representatives.

3. When you click the Submit button, the following occurs:
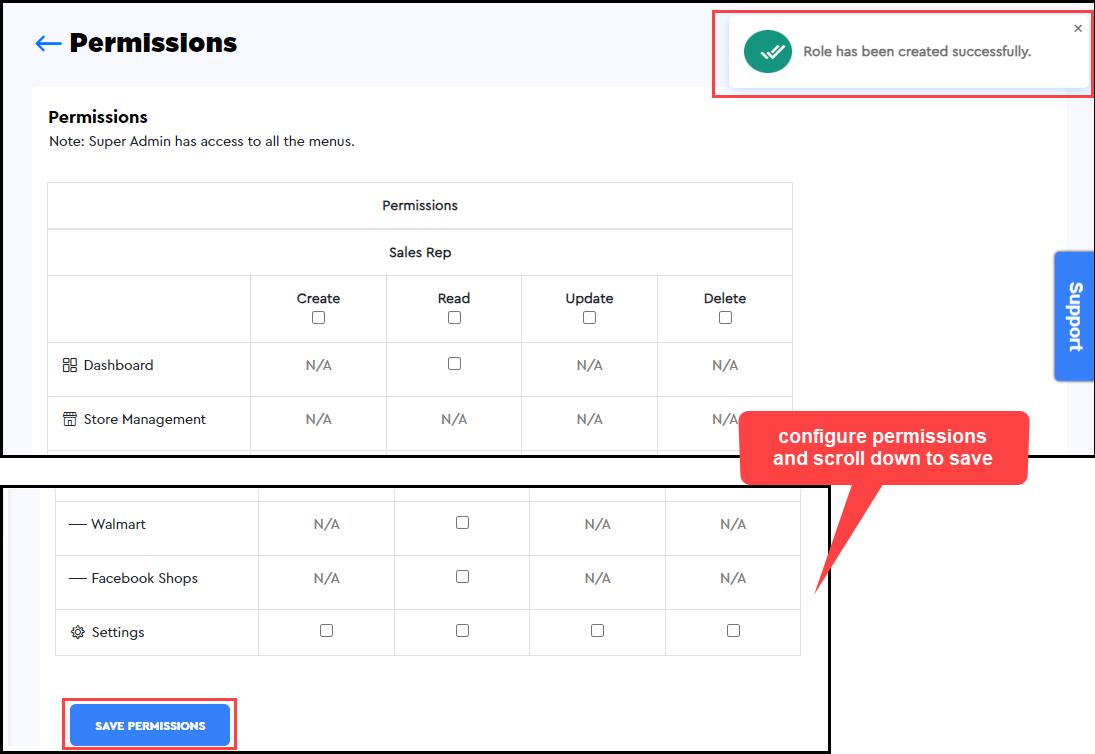
a. The role is created successfully.
b. A notification popup containing the message of success appears on the top right corner of the page.
c. The Permissions page opens: You are navigated to the next step i.e., assigning permissions to the newly created role.
So, either you can assign permissions right after creating the role, or you can just click the Save Permissions button and come back later to assign or edit the permissions for the newly created role.
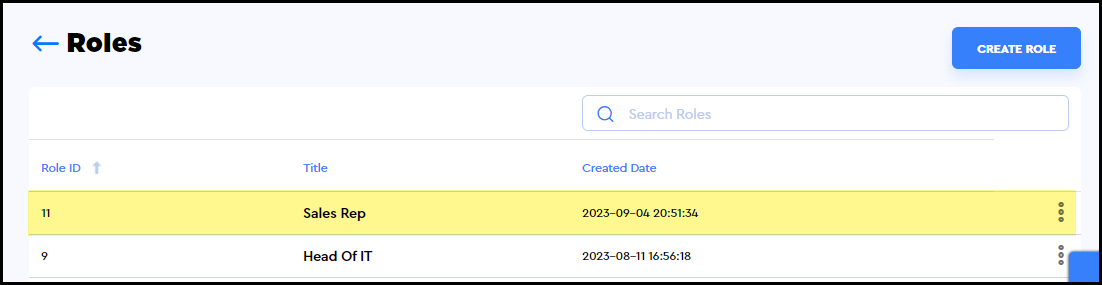
4. When you click the Save Permissions button, you are navigated to the main page of Roles. On this page, you can see that your newly created role is listed at the top of the page. In our example, it’s “Sales Rep.”
Now you can assign this role to a user or multiple users in your system. Learn more about role assignments.
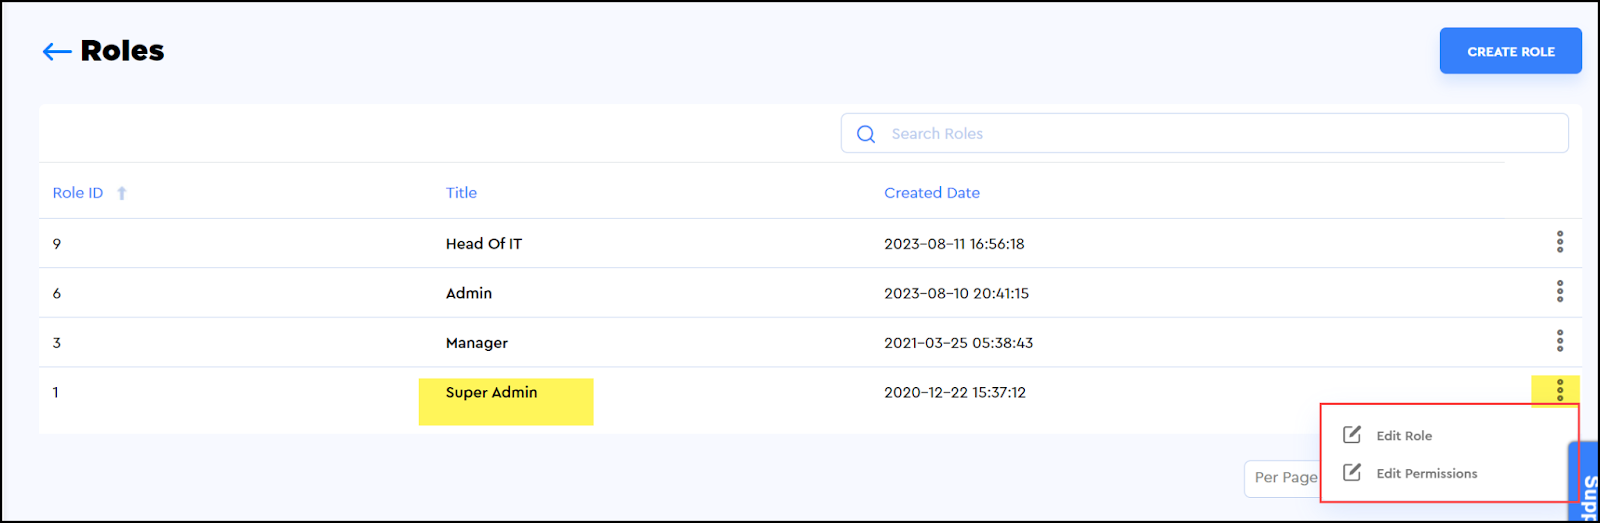
Edit a role
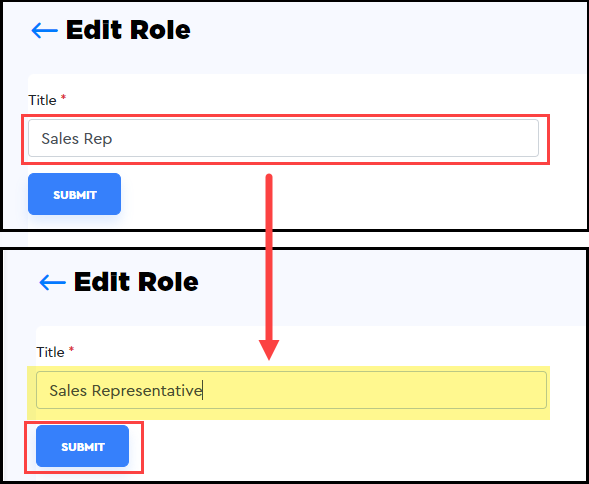
Once you have created a role, you can always edit the role name. To do so, follow the few simple steps explained below.
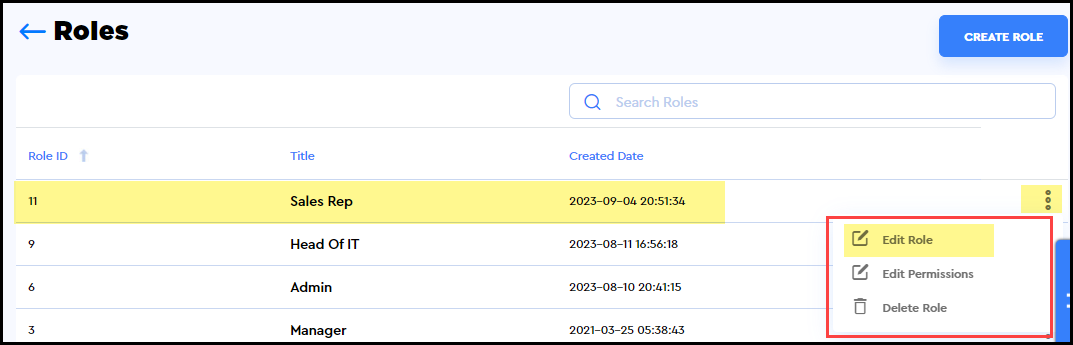
1. Click on the kebab menu icon given against the role, and select the Edit Role option.
2. On the Edit Role popup, you can modify the name of the role. Once the edits are made, click the Submit button.
3. When you click the Submit button, the following occurs:
a. The role is updated successfully.
b. A notification popup containing the message of success appears on the top right corner of the page.
c. You are navigated back to the main Roles page where you can see the updated role name.

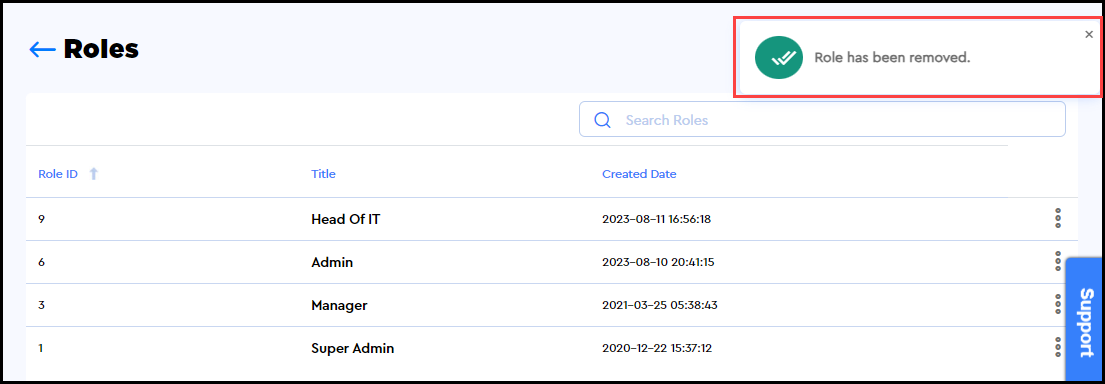
Delete a role
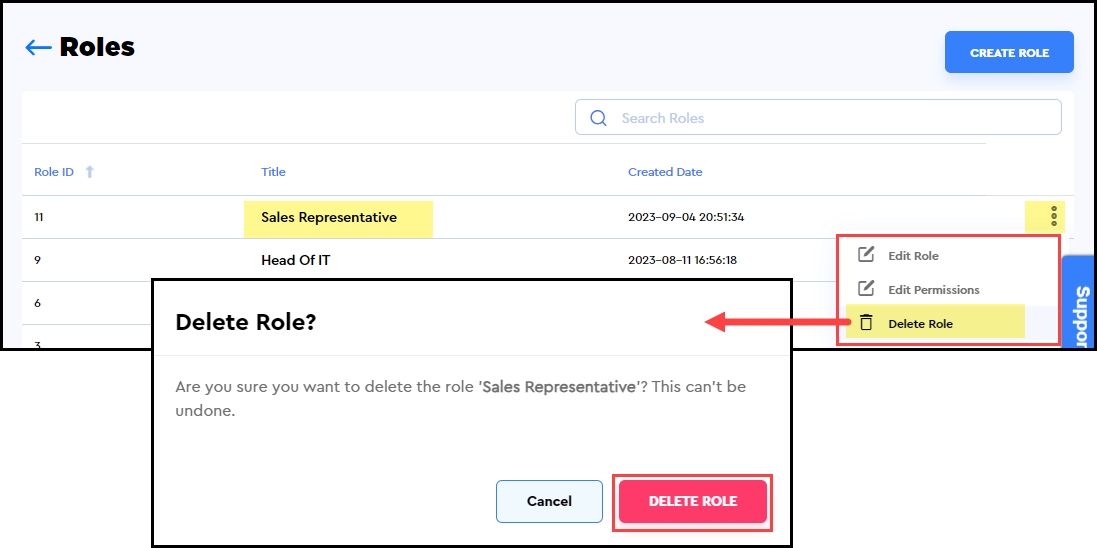
If there are cases when you no longer need a role, you can simply delete the role by following the steps below.
1. Click on the kebab menu icon given against the role, and select the Delete Role option.
2. On the Delete Role confirmation popup, click the Delete Role button to confirm the deletion action.
3. Once the role is deleted successfully, the following will take place:
a. A notification popup containing the successful deletion message will appear on the top right corner of the page.
b. The Roles page will be refreshed to display the updated list of roles.
Permissions
Granting permissions to a role
As explained earlier, you can always edit permissions of the existing or a new role at any given time. To do so, follow the steps elaborated below.
1. Click on the kebab menu icon given against the role, and select the Edit Permissions option from the dropdown menu.
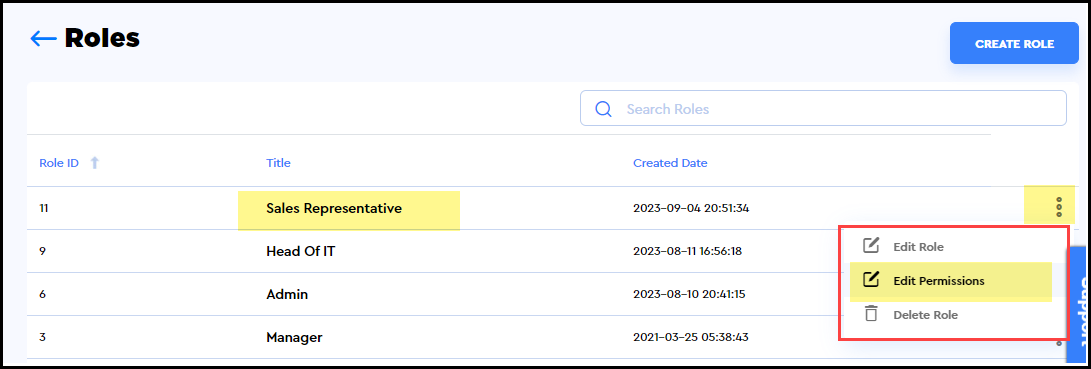
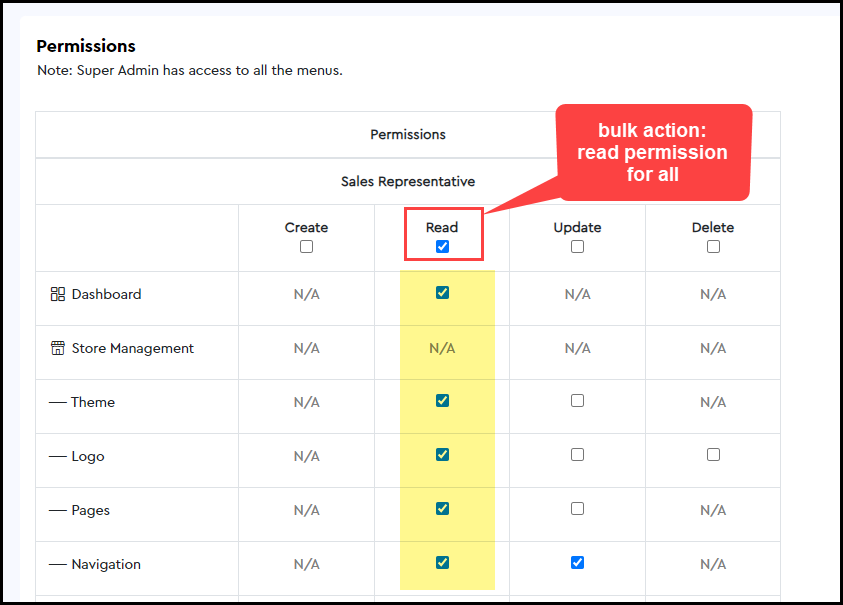
2. The Permissions page will open. On the Permissions page, you can see the name of the role for which you are editing the permissions.
Then, there is the permissions table with the following columns:
First column: The feature against which you want to grant permission to the role.
The remaining 4 columns can be used to define the access level for the role.
-
- Create: The permission to create a new object/record in the system. For example, creating a new user.
- Read: The permission to view an object/record. For example, viewing the customers.
- Update: The permission to update/edit an object/record. For example, editing a customer record.
- Delete: The permission to delete an object/record from the system. For example, deleting a user.
Each of the above columns contains the following options to manage these permissions against each feature listed in the first column.
- Checkbox:
- Checkmark the checkbox if you want to grant permission to create, read, update, or delete. You can checkmark the checkboxes according to your business requirements.
- For example, if the sales representative is only allowed to create, view, and edit the user records, then you will only checkmark the boxes for Create, Read, and Update. The checkbox for Delete will remain unchecked in this case.
-
Bulk assignment: If you want to grant a certain permission type for all the features in the left column, you can simply checkmark the first checkbox given under the permission name.
-
For example, if you want the sales representative role to view all the pages/features listed in the first column, you can bulk-check the Read permission as demonstrated in the image below.
-
-
If you don’t want to grant a certain permission for a certain feature (listed in the first column), you can simply leave the checkbox unchecked.
-
For example, as per the settings configured in the image below, the Sales Representative will not be allowed to Update the theme, logo, and pages of your store.
-
- Checkmark the checkbox if you want to grant permission to create, read, update, or delete. You can checkmark the checkboxes according to your business requirements.
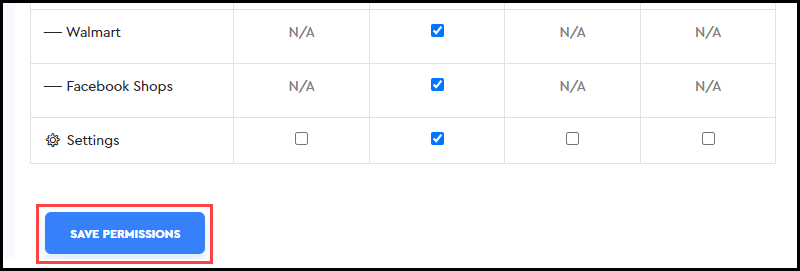
- N/A: This indicates that a certain permission level does not apply to the feature type against which it is written.
- For example, as the settings configured in the image below, the Store Management module is created by default, and the system does not allow any role type to create, read (explicitly), update, or delete it.
3. When you are done with the permissions assignment, click the Save Permissions page.
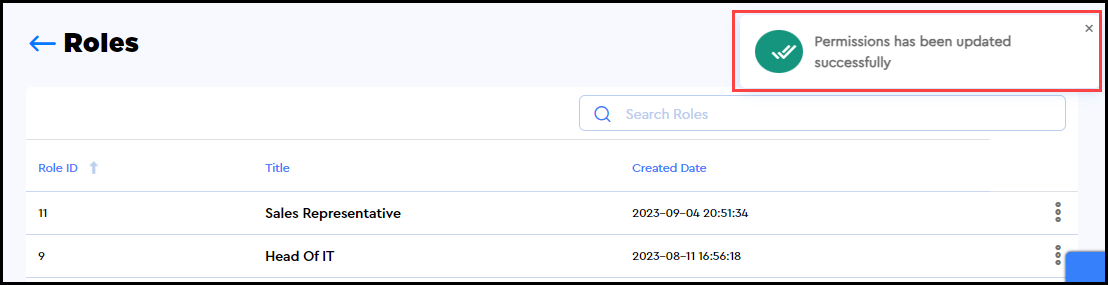
4. When the permissions for a role are updated successfully, the page refreshes to display the main Roles page. Also, a notification popup containing the success message will appear at the top right corner of the page.
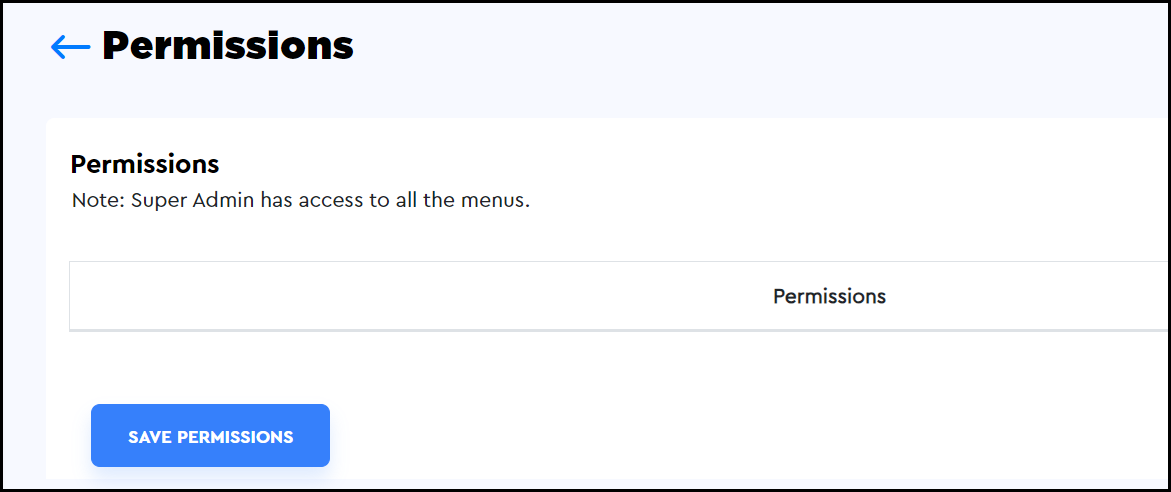
Permissions for Super Admin
A super admin has access to the entire admin panel and its permissions cannot be altered. When you try to edit the permissions of the super admin, the Permissions page will be loaded with an informative note as demonstrated in the image below.